"Thick Style Basic 6"x 6"x 3/4"
 This is going to be the first of a series tutorials that I do. I will start with the basics and then work my way up to the more advanced projects. They will be spread out, so stay tuned and watch for all different tips and demos coming in the future. Today I am going to start with a THICK box style 6"x 6"x 3/4" envelope. I want to thank my husband because he has been instrumental in helping me perfect my “Thick” style envelopes. If you do not know me, my styles of cards are always quite thick and the majority of the time have vintage brooches or bulky embellishments on them. I was faced with an envelope problem early on and posed this question to my husband. How can I fit my thick card in a standard style box envelope? Well, I couldn’t and that is when my loving husband stepped in to help me. He is really good with figuring out things (as you will see as my advanced tutorials come up) He created a template for a 6”x 6”x ¾” Envelope. It seems easy enough right? Not for me, trying to make those edges line up, be even and have enough area for the adhesive and closure can be a challenge. Not for my hubby, he worked it out and now I have the perfect “Basic Thick Box Style Envelope Template”. Thank you honey! Please note, I use a lot of Stampin Up products, because I became a demonstrator last year for the discounts. Please feel free to check out my SU website, but use what ever product brand you like ....Ok, Lets get started!! :)
 Items needed are a Cutting Mat, Hobby Blade, Paper cutter with scoring blade, Bone Folder, Mini Glue Dots, Sticky Strip, Paper Snips, Velcro and my special tool,” Thinking inside the Box” by “priscillastyles” This is a block style aid for making thick style envelopes. I do not know how many times I would try and line up my envelope edges to find that they were slightly off, it had gap openings, was lopsided, did not have enough room for the adhesive, you name it, I have done it. Well, after my husband made the block for me, one of my scrap booking friends asked if he could make her one. He did and she loved it! She encouraged me to share it with other card makers. Well, with a lot of sweet talk, I was able to convince my husband to make up some to share with who ever would like to try them. My husband builds model airplanes for a hobby and used his supplies to make up a few. All he asked was that if I did share with people that we do not lose money in the process and I had to copyright it. So after figuring out the supplies, cost, paperwork and literally pennies for my husband’s labor, you can now buy a
"Thinking Inside the Box"
Envelope Making Kit
by “priscillastyles” on EBay
by “priscillastyles” on EBay
I do sell these on eBay, but if you buy direct from
me HERE on my blog, you will receive the discounted price.
me HERE on my blog, you will receive the discounted price.
OK here we go…. my husband was helping me take the pictures and was standing on an unstable step stool to take these pictures, so I literally made this envelope in 10 minutes…
STEP ONE….
Using the provided template, trace and cut-out card stock.
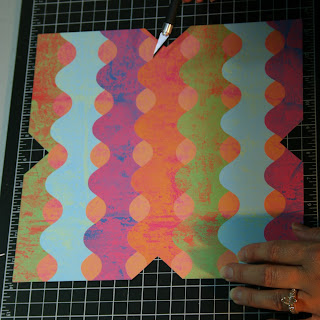

STEP TWO….
LIGHTLY score the inner side of the envelope, from V to V, all the way around. Make an additional 4 scores from your original score. (See template lines.) HINT: Always use light pressure when making scores being careful not to penetrate your card stock material.
 STEP THREE….
Using a bone folder, following the score, make nice crisp folds.
 STEP FOUR…..
Center the “Thinking Inside The Box” block tool on the envelope.

STEP FIVE…..
Place two mini glue dots on the inside of one of the outer flaps. Making sure your “Thinking Inside the Box” block is centered upon your work, align edges and connect the two outer flaps to the center.

 STEP SIX…..
Attach two long strips of Sticky Strip to the lower flaps outer edges. Center aid, remove backing and fold up to the center by pressing down with pressure. Due to using the block, the corner should meet perfectly in the center with the other flaps.

 STEP SEVEN…..
Cut desired size of Velcro and attach both pieces together. Remove the backing from ONE SIDE only and place the exposed adhesive side to the top corner flap. Remove the second adhesive backing, lower the flap – aligning it to the center – and firmly press. Pull the Velcro pieces apart and cut off any excess Velcro material.

 STEP EIGHT…..
Embellish your new custom-made envelope as desired. Be sure to use aggressive adhesive practices to insure that your embellishments are firmly anchored when your envelope is opened and closed.
I think the envelope is just as important as the cards you make. We all put so much effort into our handmade cards, so, don’t they deserve to have a nice keepsake style envelope? I hope you enjoyed my tutorial and I am really looking forward to sharing more tips and projects with you in the future. Feel free to email me with any questions, comments or concerns at
heatonup@verizon.net
I will end with a quote I saw on Judy’s signature from SCS..thanks Judy :
" If you have a talent, use it in every which way possible. Don't hoard it. Don't dole it out like a miser. Spread it lavishly like a millionaire intent on going broke.
~Brendan Frances~
Thank you for stopping by and
Please feel free to leave me a question or comment.


What a great tutorial Priscilla. I kept wondering how you were getting those extra thick envelope boxes. :)
ReplyDeletei might have to go shopping LOL cool trick priscilla so kind to share thanks
ReplyDeleteI AM SO HAPPY YOU POSTED THIS!!!!!
ReplyDeleteThanks so much Priscilla! This is an awesome tutorial! I couldn't move fast enough to get my order in on EBAY! Can't wait for it to arrive! Pass on a great BIG Thank You to your hubby from me for all his help on this:)))
ReplyDeleteGreat tutorial! Very well-demo'd and such a useful item!!
ReplyDeleteThanks for your anniversary wish Priscilla! You have a sweet hubby too helping you with your template and tutorial! You are helping so many people with struggles that they have with envelopes. It's very kind of you to share.
ReplyDeleteExcellent tutorial! Thanks so much. Have a wonderful day.
ReplyDeleteThanks for a great tutorial, the pics are great!
ReplyDeleteGreat job on the tutorial!
ReplyDeleteI've been waiting for this! Great tutorial, look forward to trying it!
ReplyDeleteWhat a great tutorial Priscilla!!!! Your creations are always amazing girl!!
ReplyDeleteWow Priscilla! What a great tutorial!!! I'm so glad I found your blog! Very enchanting!!! :)
ReplyDeleteLove & Magick to you!!!
Valarie
You did awesome! You have quite the unique vintagey style! Love it. Congrats on your first of many tutorials!
ReplyDeleteHi Priscilla, I've nominated you for a pretty blog award over on my blog. :)
ReplyDeleteHI Priscilla! What a great envelope tutorial! I love the added detail of the flowers for a closure. So pretty.
ReplyDeleteThank you also for stopping by my blog and leaving such a nice comment. Made my day! :)
Hey Priscilla, I just nominated you for a Blog Award. Go check out my blog for details!
ReplyDeletehttp://mcmahonfive.blogspot.com/2009/04/blog-award.html
Cool tutorial! Thanks for sharing!
Hi! What I love about what you do is that everything has a very "Priscilla" style! If I see one of your projects, I know exactly who made it! Thanks for your comments on my blog -- keeps me going. (And your husband is SO nice to help you!)
ReplyDeleteI bought one of the box envelopes kit and it's great. I give it a 100%. I tried to make a box envelope and it never came out right, it always looked messy, but now this will take care of that. I am so happy I bought the box envelope kit and it's well worth the money. My feedback is 100%+. Thanks Priscilla. Susan Tobalina
ReplyDeleteI just want to say thank you for this amazing tutoral! I have been going crazy for 2 months trying to figure out how to make a 6X6 envy.This has now solved my problems. Great Job! Hugs XXXX Beth
ReplyDeleteFinally! I found someone that understands what I mean by a "thick envelope"!! This is perfect and your awesome!
ReplyDelete